30 minutes to enjoy the irresistible combination of melted cheese and savory taco sliders that'll have your taste buds jumping with joy!
Savory Taco Slider Recipe
It's Taco Tuesday! Yay!
If you're looking to whip up a quick and easy yet delicious meal, then look no further!
These yummy cheesy taco sliders are the answer!
With just a few simple ingredients, these sliders can be on your dinner table in no time.
Whether you're a busy mom juggling family duties or an adventurous cook looking for something fun to try, this recipe has something for everyone.
Get ready to enjoy the irresistible combination of melted cheese and savory tacos that'll have your taste buds jumping with joy!

All you need are some Ortego taco slider shells, and a few other pantry staples and you're good to go.
Preparing the ingredients takes no time at all and lunch will be on the table in 30 minutes.
Why You Will Love This Recipe
- the whole family will love them
- use your favorite toppings
- easy weeknight meal
- simple ingredients
- delicious dish
- crowd-pleasing favorite

Makes 18 tacos
Prep time: 20 minutes
Cook time: 10 minutes
Mexican Sliders Ingredients
- Refried beans, heated
- Ground beef
- Small onion, finely chopped
- Taco seasoning
- Diced tomatoes with green chilies
- Water
- Cream cheese, cubed
- Shredded Mexican blend cheese
- Ortega taco slider shells

For exact measurements, please see the printable recipe card below!
Supplies Needed
As an Amazon Associate, this post may contain affiliate links and I may receive a small commission at no additional cost to you. See my disclosure policy for more info.
How to Make Cheesy Taco Recipe
Preheat oven to 400 degrees.
Brown the ground beef with the onion.

When the meat is cooked through, add the taco seasoning, tomatoes, and water. Stir to mix.
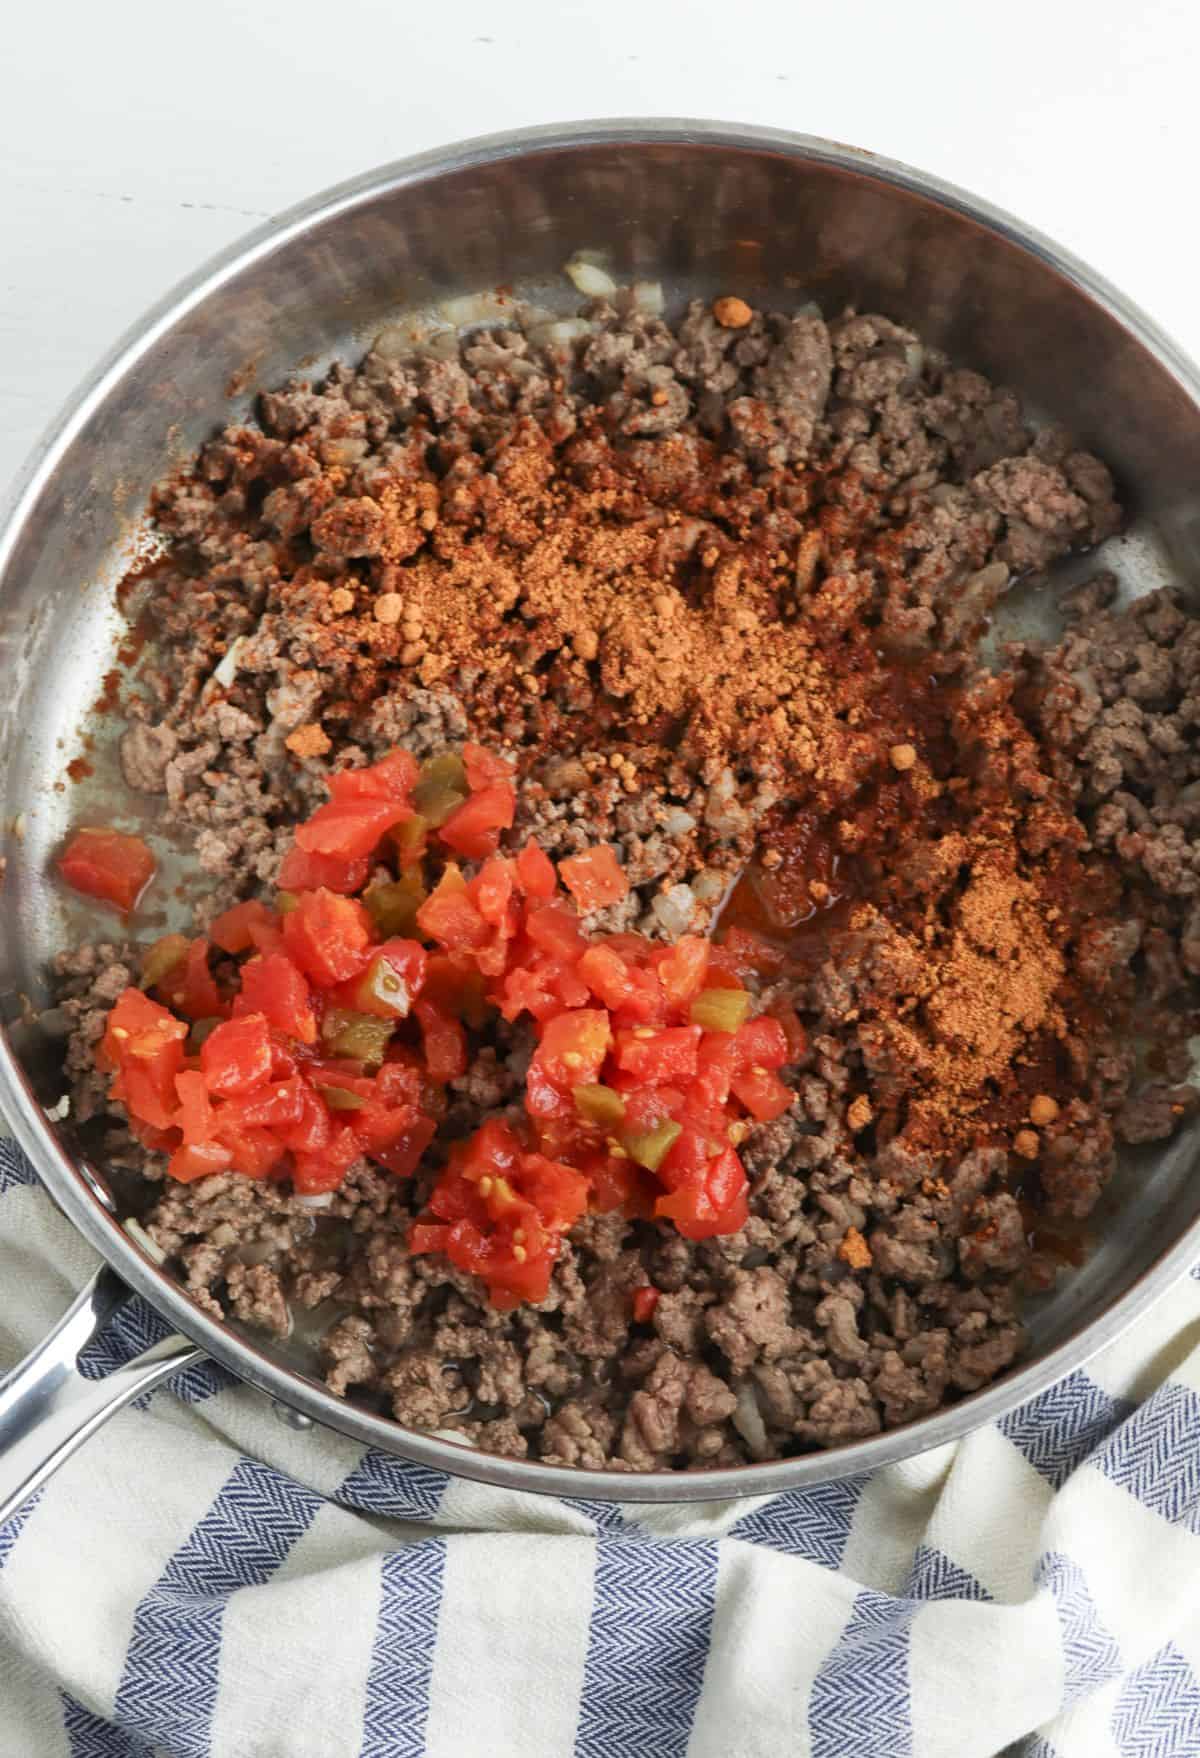
Allow the ingredients to simmer for 5 to 10 minutes until the liquid has reduced.
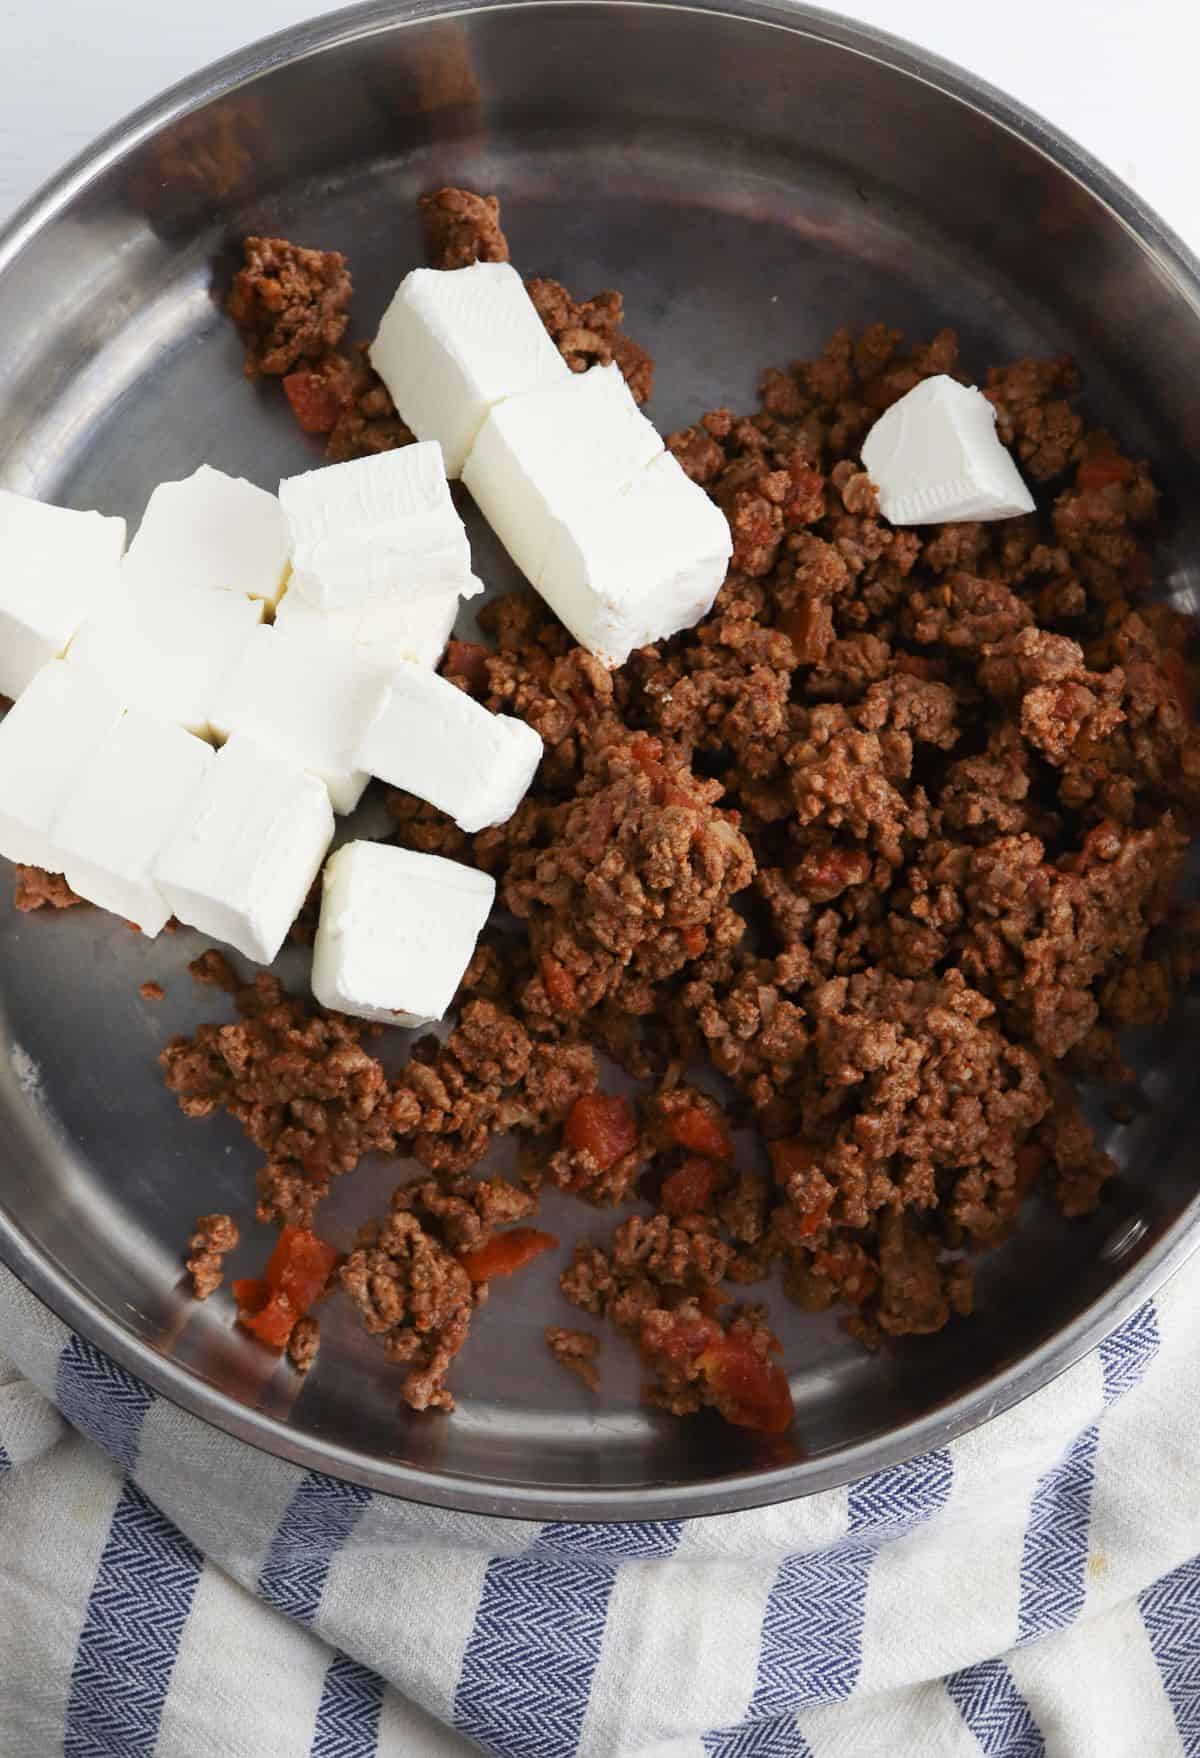
Add the cream cheese to the pan and stir to mix.
Place the taco shells in a taco stand.
Spread the refried beans along the side of each taco shell.

Fill the shell halfway full of ground beef mixture.

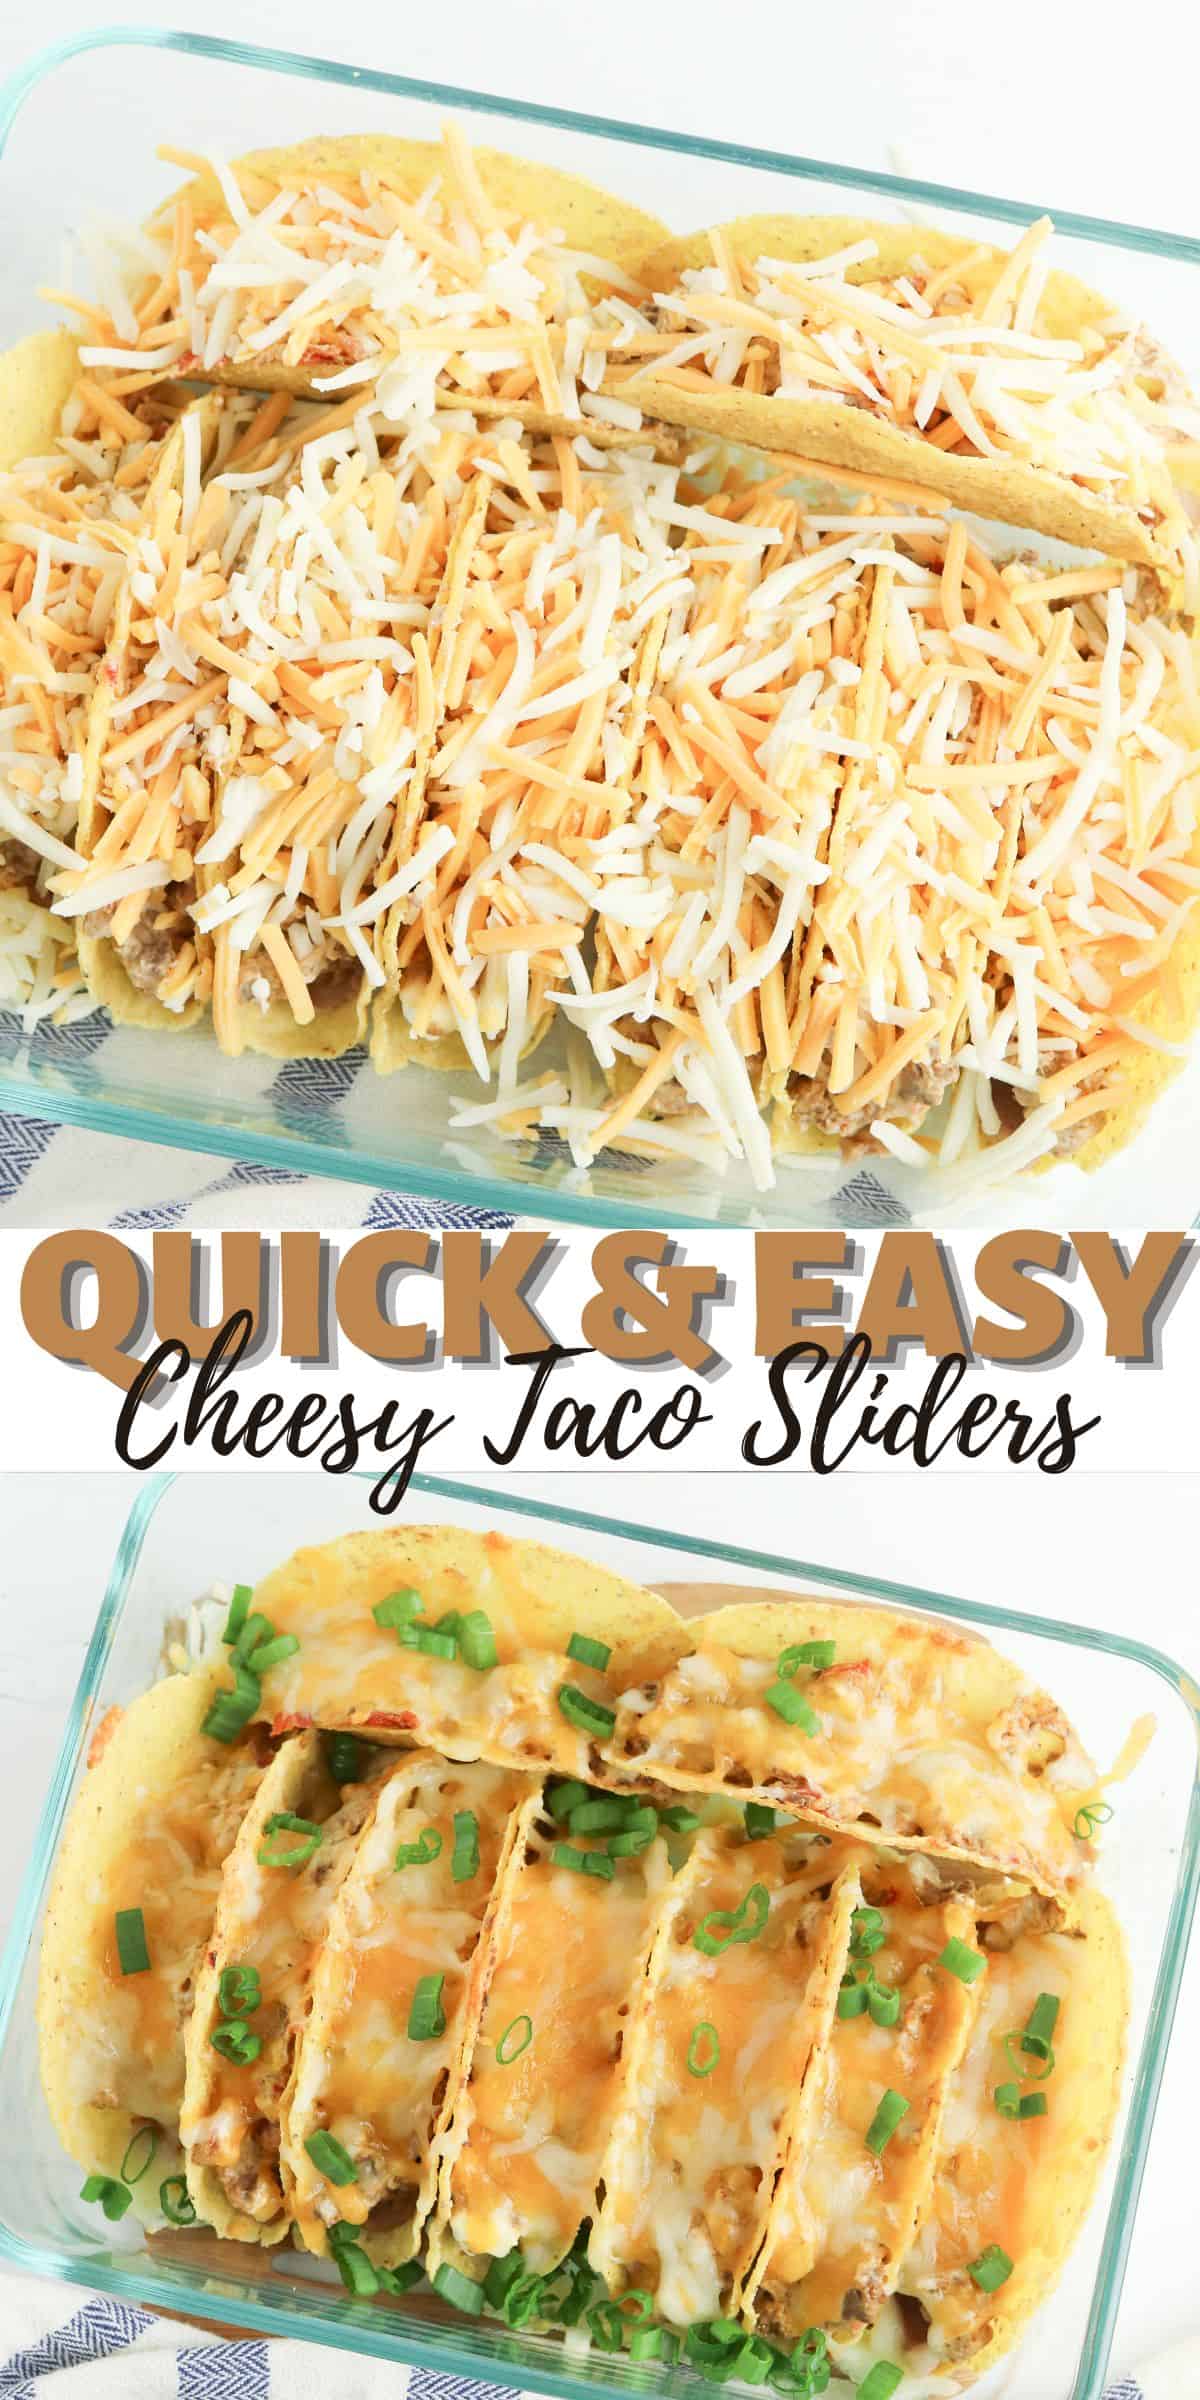
Top with shredded cheese.
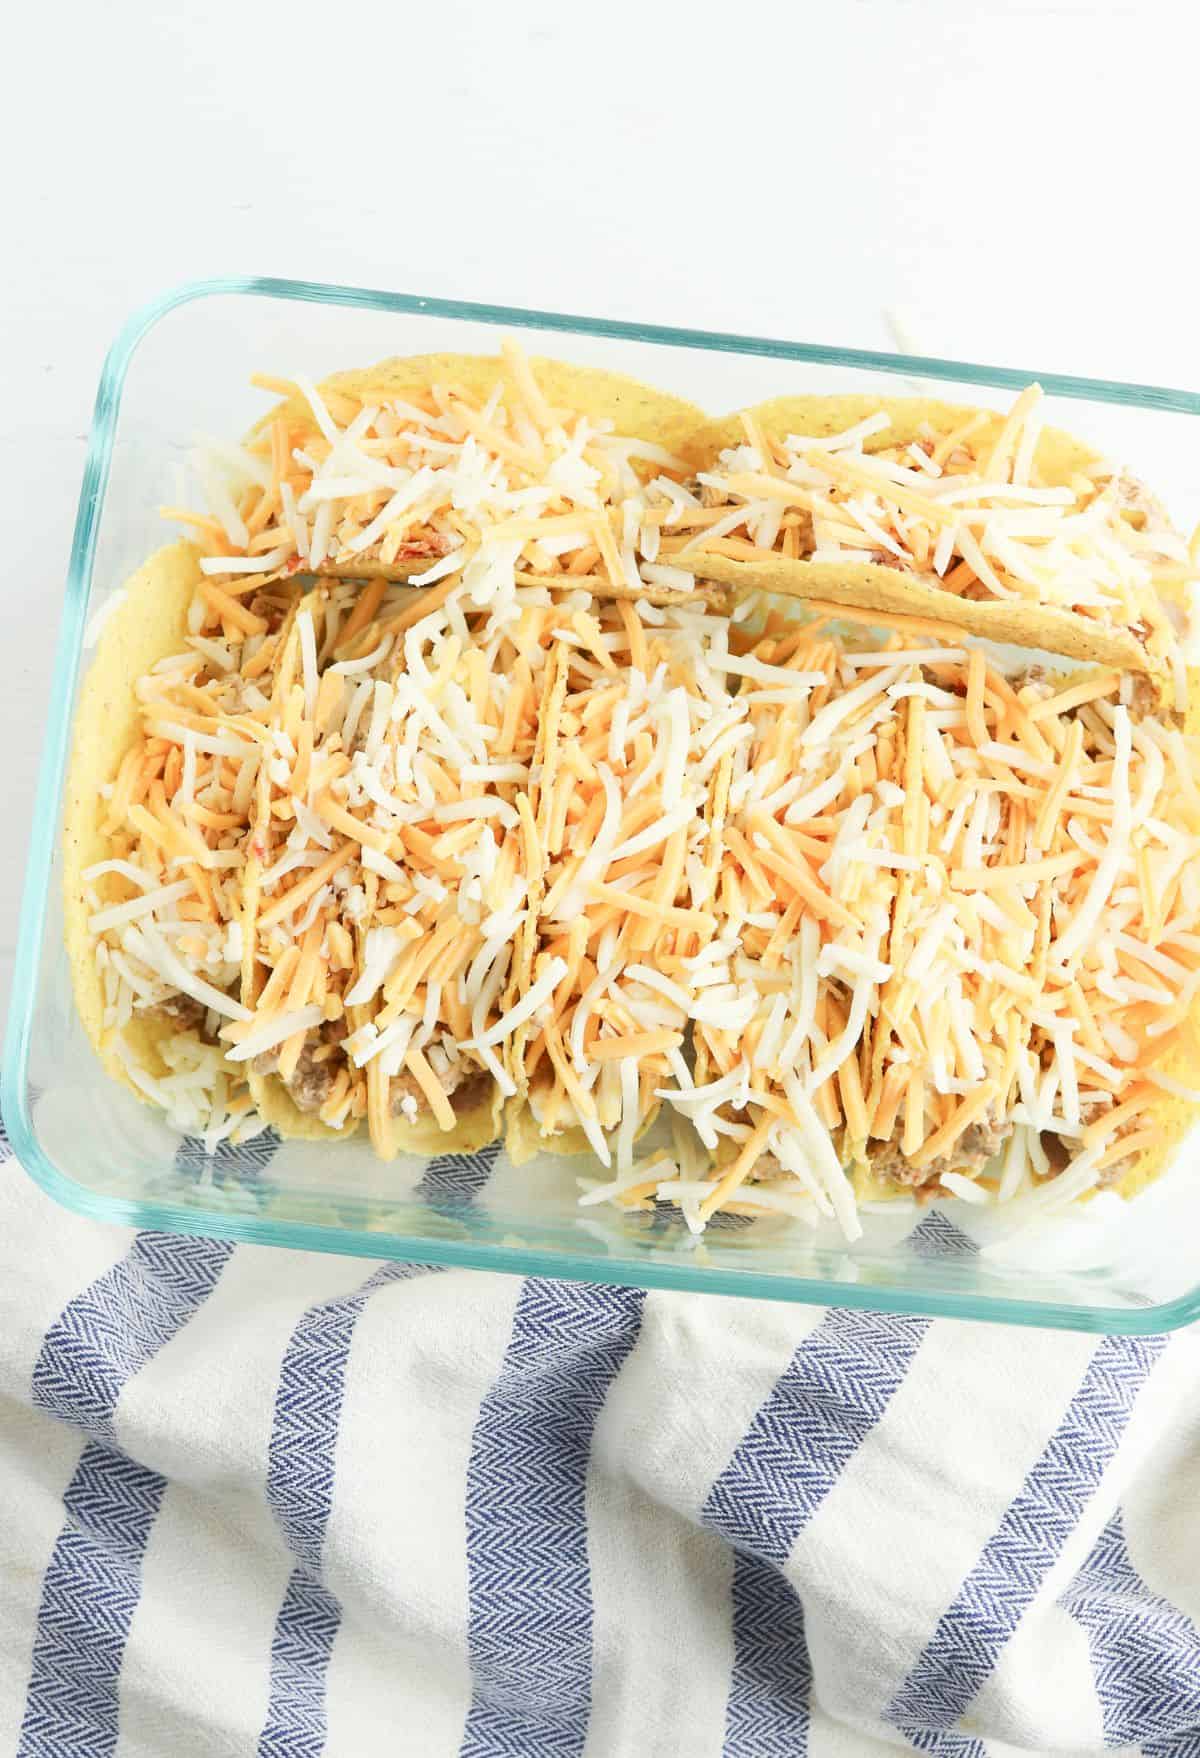
Place the taco shells upright in a baking dish and bake for 10 minutes, until the shells are crispy and the cheese is melted.

Enjoy with a side salad.
More Taco Favorites
- Air Fryer Taco Bell Copycat Breakfast Crunchwrap
- Taco Stuffed Peppers Recipe
- Ranch Taco Dip Recipe
- Walking Tacos Recipe
- Taco Stuffed Crescent Rolls
- Pulled Pork Street Tacos
- Meatless Taco Dip Recipe WW 10/5 Points
In Conclusion
Sometimes it's nice to switch up dinner routines without having to put too much effort into it.
With this quick & easy cheesy taco slider recipe, now you can do just that!
This recipe will deliver a big flavor every single time.
So go ahead and give it a try — we know your taste buds will thank you later! Enjoy!
Be sure to pin it for later and follow us on Pinterest.


Leave a Reply